What I’m About to Tell You Is Straight From Experience
Look bubby, I’ve been making this https://pekinthechef.com/thecheesecakefactory/lindas-fudge-cakeLinda’s Fudge Cake for over twenty years now, and I still remember the first time I tried it and absolutely butchered it because I thought I could skip steps
That wedding reception where I watched that ganache slide right off those cake layers while the bride stared at me with those eyes, that taught me a lesson I’ll never forget
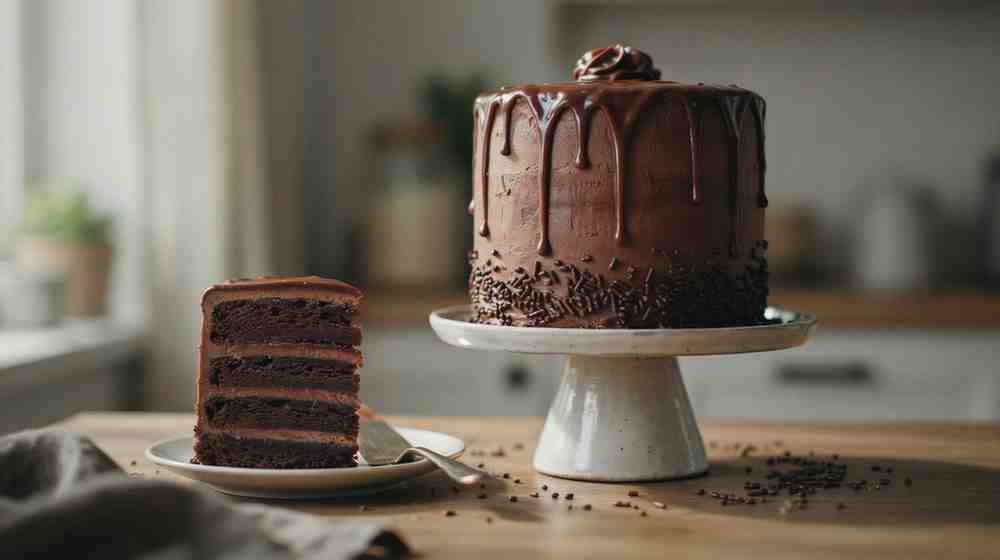
This isn’t some quick brownie situation or a box mix you throw together when the kids are screaming for dessert, this is a six-layer chocolate tower that’s gonna demand you clear your afternoon
You’re gonna end up with a 9-inch cake that feeds about 12 to 16 people, and each slice is gonna weigh about 5 to 6 ounces because nobody wants some dainty little sliver of this richness
Time wise you’re looking at about 45 minutes of actual hands-on work, the baking itself runs about 30 minutes, and then you’ve got at least an hour and a half of cooling time that is absolutely non-negotiable
What You Need From the Store and Why It Matters
Alright let’s talk ingredients and I’m gonna be real specific because this matters more than you think
For the cake itself you need 210 grams of all-purpose flour, and I really recommend weighing it because flour packs down and you’ll end up with too much and your cake will be dry
Plus 400 grams of white granulated sugar which is about 2 cups
Now here’s the thing about the cocoa and listen to me on this because it’s crucial, you need 75 grams of unsweetened Dutch-processed cocoa, not natural cocoa, not that generic stuff in the yellow can
Dutch-processed is what gives you that deep dark almost-black color and that mellow rich flavor, natural cocoa gives you a lighter more acidic crumb that misses the mark completely
Then grab 1.5 teaspoons each of baking soda and baking powder, and a full teaspoon of salt, and I mean a full teaspoon not a pinch because salt makes chocolate taste more chocolatey
For the wet ingredients you need two large eggs but they absolutely have to sit on your counter for at least an hour because cold eggs shock the batter
Plus one cup of whole milk at room temperature, half a cup of neutral vegetable oil, two teaspoons of vanilla extract that’s actually vanilla not imitation
And the absolute non-negotiable ingredient that makes this whole thing work, one cup of boiling water and I mean actively boiling not just hot from the tap
That boiling liquid is what blooms the cocoa powder and releases all those oils that give you that dense fudgy texture
For the ganache you need three full cups of heavy whipping cream with at least 36 percent fat, six cups of semi-sweet chocolate chips and don’t cheap out on these
65 grams of unsalted butter cut into small chunks, and three more teaspoons of vanilla
Now between you and me bubby I always throw in half a cup of strong brewed coffee when I’m making the ganache, it doesn’t make the cake taste like coffee at all but it deepens that chocolate flavor
Getting Your Pans and Oven Ready
Set that oven to 350 degrees Fahrenheit or 175 Celsius and here’s my number one rule bubby, do not open that door for the first 25 minutes
Every time you open that door you lose heat and your rise gets compromised and you’ll end up with a dense flat cake
You need two 9-inch round cake pans, not 8-inch and definitely not glass because glass conducts heat differently
Now grease those pans with a butter and oil combo, not just cooking spray and not just butter, but a little bit of both mixed together
Line the bottoms with parchment paper rounds and dust the sides with flour or you’ll be crying when that cake sticks
Mixing Everything Together
Throw all your dry ingredients into a big bowl and whisk them together until they’re completely lump-free because cocoa is sneaky and it loves to hide in little clumps
Then add your room temperature eggs, the whole milk, the vegetable oil, and the vanilla, and beat that on medium speed for about two minutes until it’s thick and glossy
Now drop your mixer to the lowest setting and slowly stream in that boiling water while the mixer is still running
And here’s where every single person calls me in a panic bubby because that batter turns into this thin watery soup that looks absolutely wrong
But that’s exactly what you want, that thin consistency is what gives you a moist dense crumb instead of a fluffy dry cake
Baking and Cooling
Slide those pans into the oven and set your timer for 30 minutes, but be prepared to go to 33 if needed because every oven is different
When you think they’re done test with a toothpick right in the center and it should come out just barely dry with no wet batter clinging to it
Let them cool in the pans for about 15 to 20 minutes, then flip them onto wire racks and let them cool completely down to room temperature
And I mean completely like you can touch them and they feel cool to the touch, because any residual heat and that ganache will melt right through
Making the Ganache
While those cakes are cooling you can start on the ganache, dump your chocolate chips and heavy cream into a large microwave-safe bowl
Blast it on high for about one and a half to two and a half minutes, pull it out and stir until that chocolate is fully melted and smooth
Then toss in your butter chunks and vanilla and stir until they disappear completely into that glossy beautiful mixture
Now here’s the real test of patience bubby, you have to refrigerate that ganache and stir it every ten minutes until it firms up to a thick spreadable consistency
This takes about 30 to 45 minutes, so don’t get impatient and try to use it while it’s still runny
You’ll know it’s ready when you lift your spatula and the ganache holds a soft peak
The Scary Part, Slicing and Stacking
Alright bubby this is the part that makes even seasoned caterers break out in a cold sweat
Take your completely cooled cakes and using a long serrated knife with a gentle sawing motion slice each one horizontally into three thin layers
If your cake starts crumbling it means it was still too warm so pop it in the fridge for thirty minutes
You’ll end up with six thin discs total, place the first one on your serving plate and spread a generous layer of ganache over the top right to the edges
Repeat with the next four layers and cap it with that sixth layer, now frost the entire cake with all the remaining ganache
If you want that classic Cheesecake Factory look press chocolate sprinkles into the sides
Pop it in the fridge for at least one full hour
Common Problems and Fixes
Ganache seizes up and turns grainy, that happens when your cream was too hot or your chocolate was cheap, just stir in a tablespoon of warm cream at a time
Ganache is too thin and runs off the cake, you didn’t chill it long enough, stick it back in the fridge and stir every five minutes
Layers are domed and won’t stack flat, level that dome off before you slice
Use a hot knife to slice this cake, dip it in hot water, wipe it dry, and cut cleanly
Making It Ahead and Storing
You can bake those cake layers two days in advance, just wrap each one tightly in plastic and stash in the fridge
You can make that ganache a full week ahead and keep it in an airtight container
For a dinner party I assemble the whole thing the day before and keep it refrigerated overnight
At room temperature this cake stays moist for about four hours, and covered in the fridge it keeps for five days
Whatever you do don’t throw a slice in the microwave, if you want a warm slice just pop it in a 300 degree oven for three or four minutes
My Final Words to You
Look bubby I’ve made this cake more times than I can count and I still get nervous every single time
But that nervousness keeps me honest and makes me pay attention to the details
The boiling water and the patience with that ganache are what separate a good cake from a legendary one
Take your time, trust the process, and for goodness sake don’t skip that parchment paper because I made that mistake once and I’ll never make it again
