If you want to make those restaurant-quality bowls at home, it really starts with one thing: the rice. CAVA’s brown rice is kind of the unsung hero of their bowls.
People love CAVA because the rice has a great texture firm, fluffy, not mushy or boring.
The problem is, most homemade versions turn out clumpy or bland. Usually it’s too much water or wrong cook time.
So today, I’m showing you my copycat method. Simple ingredients, easy steps, and you’ll finally get that CAVA-style rice at home.
Let’s get into it.
What type of brown rice works best
Go with long grain brown rice. Hands down.
Long grain stays separate and fluffy after cooking exactly what you want for a bowl. The grains don’t stick together, and they keep that nice firm bite.
Short grain? Too sticky and soft. That’s better for risotto or sushi, not for layering in a Mediterranean bowl.
Long grain also soaks up flavors really well without turning into a paste. You get that chewy texture that holds up next to hummus, chicken, or falafel.
https://recipeask.com/cava-brown-rice-recipe/CAVA brown rice vs. white rice
At CAVA, you can actually choose between brown and white rice. They cook up totally different.
• Brown rice firm, separate grains. Holds its shape in layered bowls. Absorbs seasoning slowly, so flavor builds deeper.
• White rice softer, slightly sticky. Can clump together with toppings and make the bowl feel mushy. Absorbs flavor fast, which tastes lighter.
Neither is “bad” just depends what you’re in the mood for.
Ingredients you’ll need
• 1 cup long grain brown rice non-negotiable for texture
• 2 cups water you can swap half with veggie or chicken broth for more depth
• 1 tsp extra virgin olive oil keeps grains from clumping
• ¼ tsp salt (optional) brings everything together. Skip for low-sodium
• 1 tbsp fresh lemon juice added after cooking for brightness
• 1 tbsp fresh parsley, chopped (optional) fresh, colorful, mild herbal flavor
Tools
• Medium pot with lid
• Measuring cup
• Spoon (for one quick stir)
• Fine mesh strainer
• Fork (for fluffing)
How to make CAVA brown rice at home
Step 1 Rinse the rice
Put your cup of rice in a fine mesh strainer. Run cold water over it for about 30 seconds, moving the rice around with your hand. Rinse until the water runs mostly clear. This gets rid of excess starch so the rice won’t turn into a gluey mess.
Step 2 Add rice and water to the pot
dump the rinsed rice into a medium saucepan. Add 2 cups water and 1 teaspoon olive oil. Stir once just to combine, nothing crazy.
Step 3 Watch the pot
Now, this part only takes about 5 to 7 minutes. Don’t walk away, sweetheart. Keep one eye on it so it doesn’t boil over and make a mess on your stove. Trust me I’ve cleaned up enough sticky rice in my day.
Step 4 – Simmer low and slow
Once it’s going, put a tight lid on that pot and turn the heat all the way down to low. Let it simmer for 45 minutes. And I mean it do not lift the lid. Not even to peek. I know you want to. Don’t. You’ll let all the steam out and the rice won’t cook right.
Step 5 Let it rest
After those 45 minutes are up, take the pot off the heat. But here’s the trick: keep the lid on. Let it sit for another 10 minutes. This is the quiet time. The rice is still working soaking up every last drop of moisture, getting nice and firm. Patience, honey.
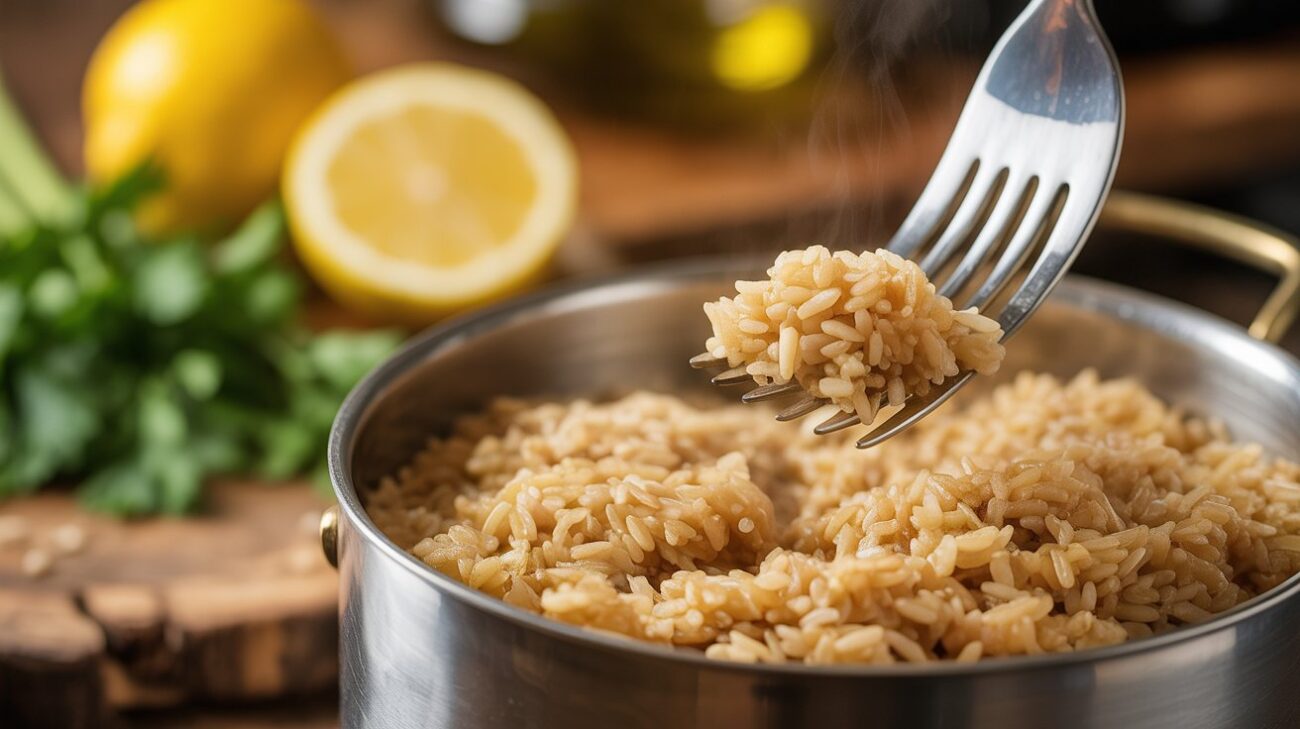
Step 6 – Fluff and serve
Alright now, take off the lid. Take a fork and gently fluff the rice nice and easy, don’t mash it. Add 1 tablespoon of fresh lemon juice (makes it sing), and toss it lightly. Sprinkle a little parsley on top if you’re feeling fancy. Then serve it up warm, just like bubby would.
Chef tips don’t skip these
• Don’t overcook it Mushy rice is hard to fix. If yours keeps coming out too soft, use a little less water next time.
• Add lemon at the end If you add it during cooking, the flavor gets dull and weak. Save it for after fluffing.
• Don’t over-stir stirring breaks grains and makes things gummy. Stir once at the beginning, then leave it alone.
• Keep the lid on Every time you lift it, you lose steam. That steam is doing the cooking. Leave it alone for the full 45 + 10 minutes.
Other cooking methods
Rice cooker Rinse rice, add 2¼ cups water (not 2), olive oil. Set to brown rice setting. Let it finish, then rest 10 minutes before opening.
Instant Pot Rinse rice, add 1¾ cups water, olive oil. Seal and pressure cook HIGH for 22 minutes. Natural release 10 minutes, then release remaining pressure.
What goes well with CAVA brown rice
Simple toppings work best. Here are some combos I actually make:
• Grilled chicken + hummus Add cucumber slices and olive oil drizzle
• Falafel + tahini Squeeze of lemon + shredded cabbage
• Roasted chickpeas + tzatziki Diced tomatoes and red onion for crunch
• Lamb + harissa Pickled onions + fresh parsley to balance heat
• Tuna + lemon herb dressing – Add arugula and diced veggies
Flavor variations
• Mediterranean herb Stir in parsley, dill, and lemon zest after fluffing
• Garlic lemon Sauté 2 minced garlic cloves in olive oil for 30 seconds, mix into rice with extra lemon juice
• Spicy Mix in chili flakes or harissa paste
• Protein bowl base Toss in chickpeas, lentils, or grilled protein directly into the rice
Storage, freezing & reheating
Fridge Airtight container, lasts 4–5 days. Cool to room temp first.
Freezer Divide into 1-cup portions in freezer bags. Remove air. Lasts up to 3 months.
Best reheating method Steam it. Place rice in a steamer basket over boiling water for 3–5 minutes. Texture stays fluffy.
Microwave works in a pinch add 1 tbsp water per cup of rice, heat 2–3 minutes, stir halfway
- Why does my rice burn on the bottom?
Heat’s too high or the pot’s too thin. Use low heat after boiling. A heavy-bottom pot helps a lot.
Can I double the recipe?
Yes 2 cups rice, 4 cups water, same oil and salt. Still 45 minutes cook time. Don’t triple unless you have a huge pot.
Is CAVA brown rice gluten-free?
Yes. Brown rice is naturally gluten-free. Just check spice blends if you add extras some have hidden gluten.
Can I make this in a slow cooker?
Not really. Needs a boil first, then a simmer. Slow cookers don’t get hot enough for the boil step. You’ll get mush.
Ingredients (quick recap)
• 1 cup long grain brown rice
• 2 cups water (or half broth)
• 1 tsp extra virgin olive oil
• ¼ tsp salt (optional)
• 1 tbsp fresh lemon juice (after cooking)
• 1 tbsp fresh parsley (optional)
Instructions (short version)
1Rinse the rice thoroughly Place the glutinous rice (malagkit) in a fine-mesh strainer and rinse under cold running water until the water runs completely clear. This removes excess starch and prevents the Biko from becoming gummy.
2. Cook the rice base In a heavy-bottomed pot, combine the rinsed rice, water, and a drizzle of oil (coconut oil is traditional for Biko). Give it one gentle stir to evenly distribute the ingredients. Do not stir again during cooking, or the rice may become mushy.
3. Boil (5–7 min).
4. Cover, low heat, simmer 45 min no peeking.
5. Rest 10 min with lid on.
6. Fluff with fork, add lemon juice, parsle
Instructions (short version)
1. Rinse the rice thoroughly Place the glutinous rice (malagkit) in a fine-mesh strainer and rinse under cold running water until the water runs completely clear. This removes excess starch and prevents the Biko from becoming gummy.
- Cook the rice base In a heavy-bottomed pot, combine the rinsed rice, water, and a drizzle of oil (coconut oil is traditional for Biko). Give it one gentle stir to evenly distribute the ingredients. Do not stir again during cooking, or the rice may become mushy.
3. Boil (5–7 min).
4. Cover, low heat, simmer 45 min no peeking.
5. Rest 10 min with lid on.
6. Fluff with fork, add lemon juice, parsle